
Protect your APIs with Azure API Management - part 1 (client certificates)
Options for protecting backend APIs with Azure API Management (APIM)
When you publish APIs through API Management, it’s easy and common to secure access to those APIs by using subscription keys. Developers who need to consume the published APIs must include a valid subscription key in HTTP requests when they make calls to those APIs. The APIM is doing the authorization, and you just need to enable the “Requires subscription” at the product or API level.
The second option is to use client certificates. You can use certificates to provide TLS authentication between the client and the API gateway and configure the API Management gateway to allow only requests with certificates containing a specific thumbprint. The authorization at the gateway level is handled through inbound policies.
The third option is using OAuth 2.0. With Auth 2.0, the authorization is done in the inbound policy by validating the provided JWT token. In the next blog series, we will take a look at the two applicable flows for OAuth 2.0 – authorization code and client credentials.
Client certificates
Certificates can provide TLS client authentication to the API gateway. We can configure the API Management gateway to allow only requests with certificates containing a specific thumbprint. The authorization at the gateway level is handled through inbound policies. For this scenario, we will use:
- Consumption tier instance of API Management ({https://{your_apim_instance_name}.azure-api.net}).
- Todo APIs - a Web APIs with no built-in protection. I will use the hosted version of the APIs at https://tosokr-todo-api.azurewebsites.net If you want, you can download the code from my Github repository and run it locally or host it somewhere else ({your_todo_api}). The deployment includes a Swagger documentation for easy exploration of the supported operations and easy import into APIM
- Client daemon application - a console .NET Core application that provides a certificate in the request and send a GET request to the /api/TodoList endpoint
Create an API in Azure API Management
We will publish our backend Todo APIs through the APIM because our goal is to protect the access to the APIs by requiring client certificates without making any changes to the backend.
-
Open the API Management service, and under API Management select APIs
-
In Add a new API window, select OpenAPI
-
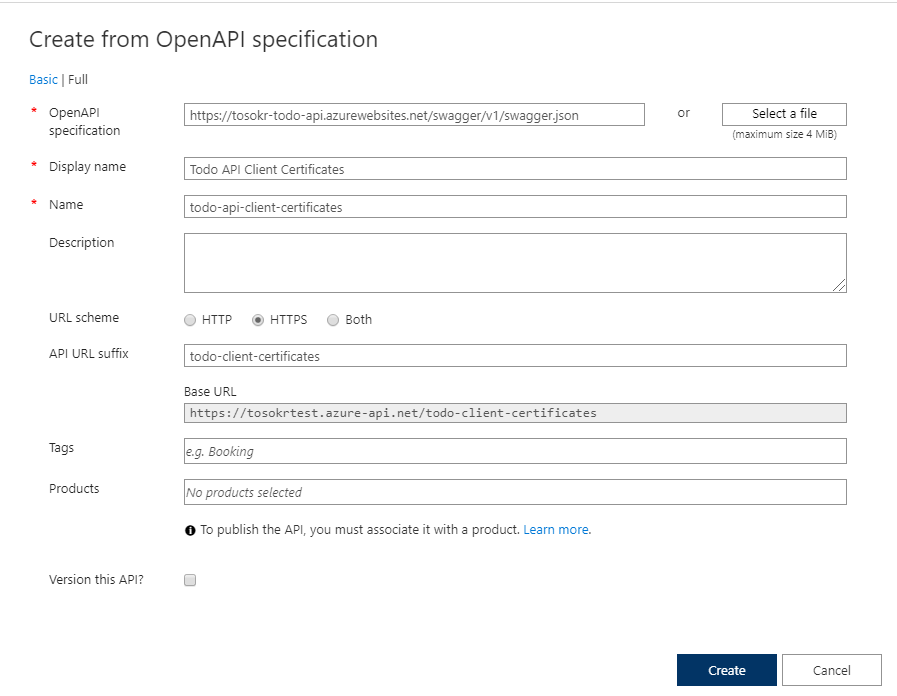
Fill in the details like in the picture (if you are hosting the Todo API, change the url for the OpenAPI specification) an click Create
-
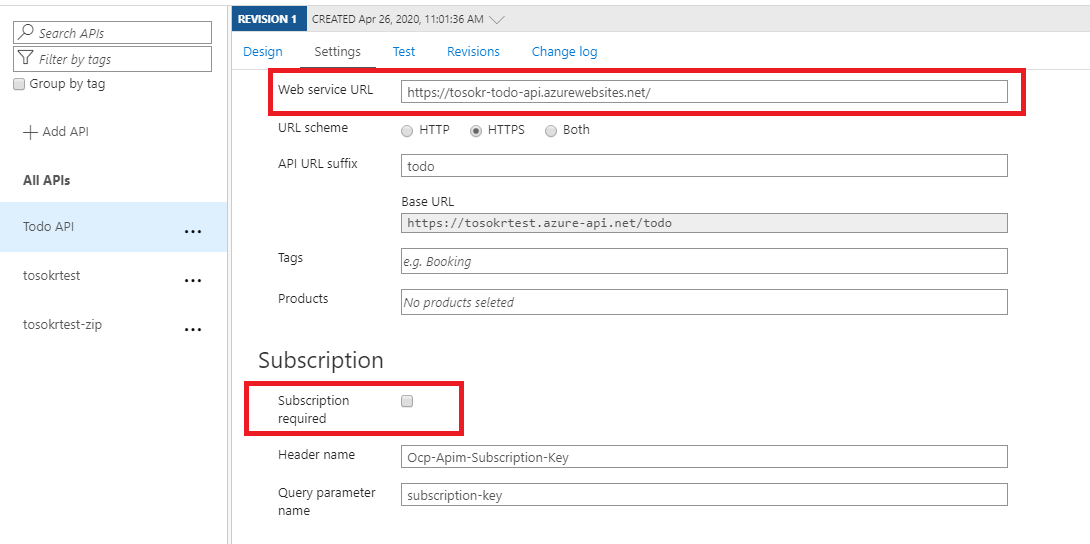
In the Settings tab of the Todo API Client Credentials Flow, enter the Web Service URL (our backend Todo API), and disable subscription requirement (just for simplicity of this demo deployment)
-
As stated in Microsoft documentation:
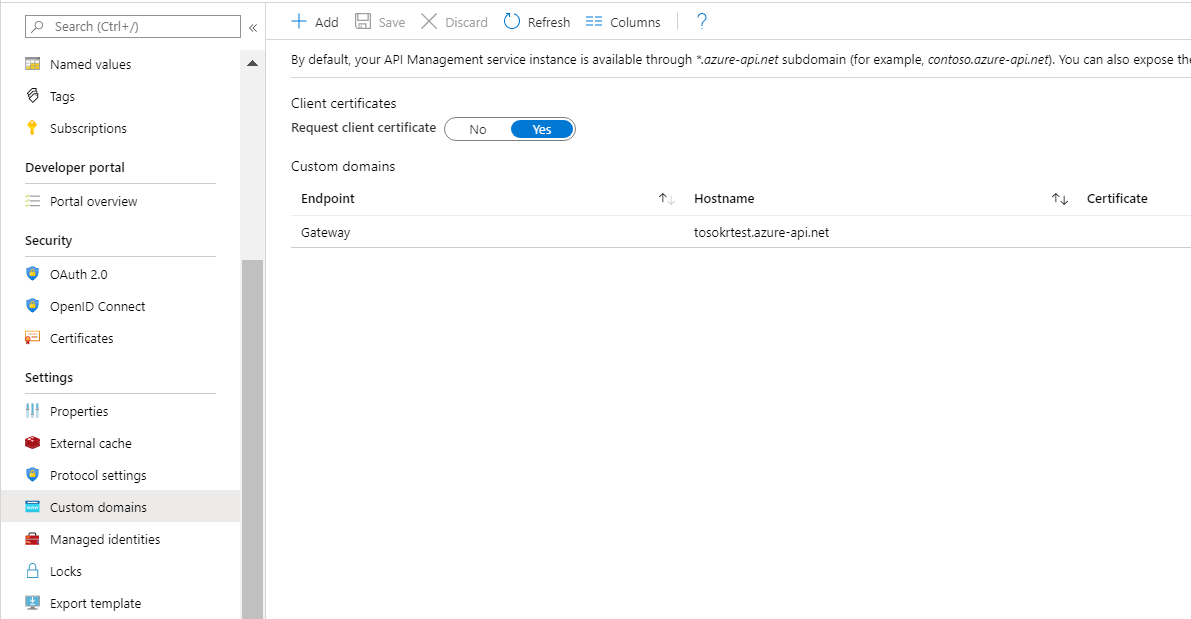
To receive and verify client certificates over HTTP/2 in the Developer, Basic, Standard, or Premium tiers you must turn on the “Negotiate client certificate” setting on the “Custom domains” blade. To receive and verify client certificates in the Consumption tier you must turn on the “Request client certificate” setting on the “Custom domains” blade as shown below.
Because we are using a Consumption tier, we need to enable the client certificates
Configure the client daemon application
Our application is a simple .NET Core 3.1 console application that reads its configuration from the appsetings.json file and sent a GET request to the /api/TodoList endpoint and lists the received items.
- Clone the repository
git clone https://github.com/tosokr/client-daemon-todo-api-cert.git - Generate new client certificates with the generateCertificates.sh script or use the myClientCertificate.pfx certificate from the repository
- Edit the appsettings.json file, add your APIM endpoint for the Todo API and change the certificate path and password if you choose to generate a new one (for production deployments, store the certificate password somewhere else!)
{ "TodoListBaseAddress": "https://{your_apim_instance_name}/todo-client-certificates", "CertificateFileName": "myClientCertificate.pfx", "CertificatePassword": "asd@3FSBQ!3dFAs#o" } - In the root folder of the application execute
dotnet runIf the certificate authentication is successful, you will receive the following output
Web Api result:

id = 1
title = Pick up groceries
owner = Mr.Brown

id = 2
title = Finish invoice report
owner = Mr.Yellow

Press any key to exit
Validate the client certificate
From the authorization point of view, it is not just enough to request a certificate, but we need to validate it and approve or reject access based on specific criteria. The validation is done in the inbound policy section of the published API. In the policy expressions, we access the provided client certificate using context.Request.Certificate, which is essentially a System.Security.Cryptography.X509Certificates.X509Certificate2 object.
To be able to validate a self-signed certificate, the APIM needs the root certificate. Support for upload of a root certificate to APIM is supported in all tiers except the Consumption tier.
Click on the Todo API Client Certificates, select All operations, and open the policy code editor.
- Verify the Issuer and the Subject Name of the certificate:
<inbound> <base /> <choose> <when condition="@(context.Request.Certificate == null || context.Request.Certificate.Issuer != "CN=client-daemon.mycustomdomain.com, OU=Azure, O=tosokr.github.io, L=Amsterdam, S=North Holland, C=NL" || context.Request.Certificate.SubjectName.Name != "CN=*.mycustomdomain.com")"> <return-response> <set-status code="403" reason="Invalid client certificate" /> </return-response> </when> </choose> </inbound> - Verify the thumbrint of the certificate and the validity date
<inbound> <base /> <choose> <when condition="@(context.Request.Certificate == null || context.Request.Certificate.Thumbprint != "456AAB1833DF842152605DF6C2B1DB2BBA29380D" || context.Request.Certificate.NotAfter<DateTime.Now)"> <return-response> <set-status code="403" reason="Invalid client certificate" /> </return-response> </when> </choose> </inbound> -
Verify the thumbrint of the certificate against uploaded certificates to APIM
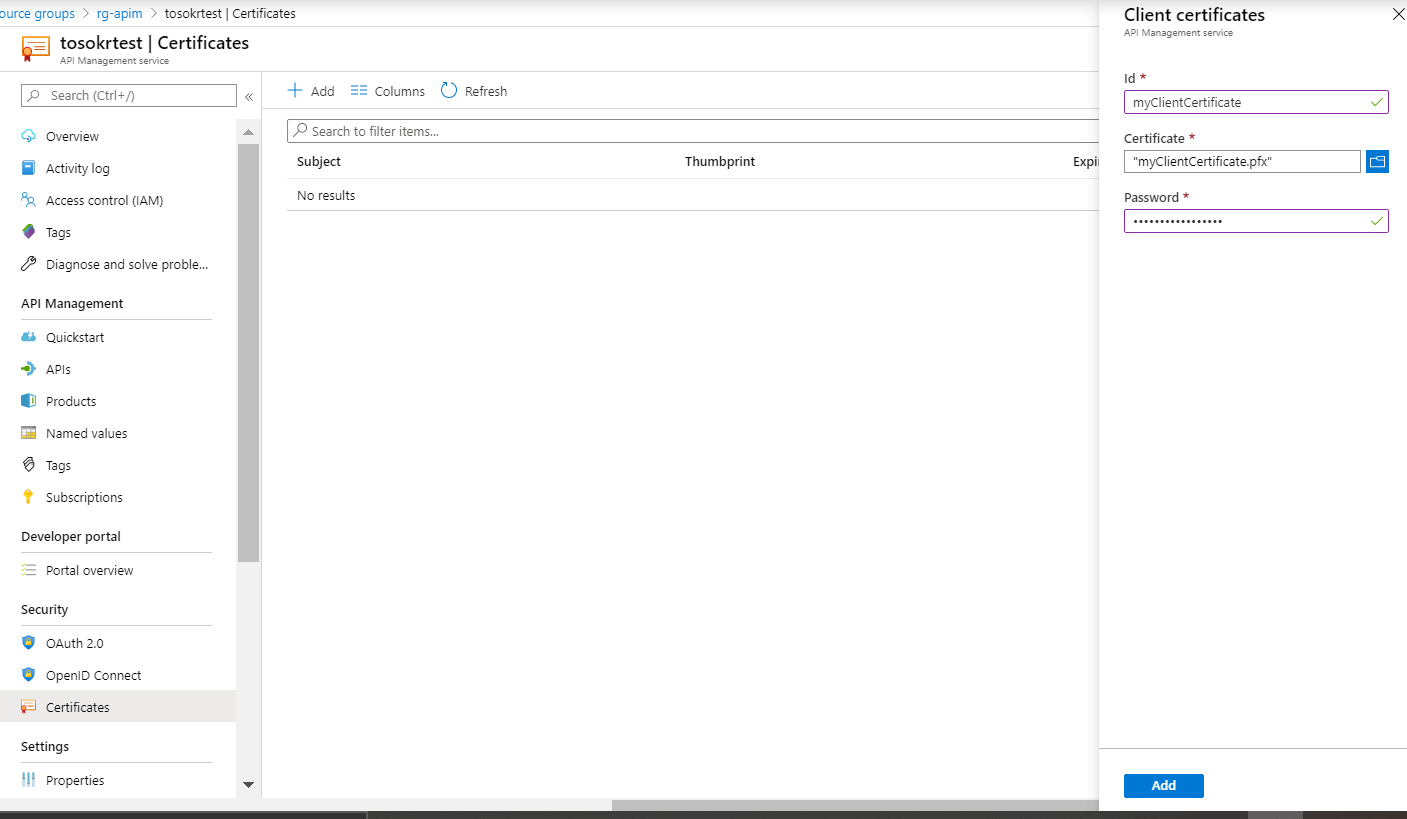
To use this feature, we need to upload our .pfx certificate to APIM
 and apply the following policy
 <inbound>
   <base />
   <choose>
       <when condition="@(context.Request.Certificate == null
       || !context.Deployment.Certificates.Any(c => c.Value.Thumbprint == context.Request.Certificate.Thumbprint)
       || context.Request.Certificate.NotAfter<DateTime.Now)">
           <return-response>
               <set-status code="403" reason="Invalid client certificate" />
           </return-response>
       </when>
   </choose>
 </inbound>
Summary
API Management gateway can enforce TLS client authentication, and it can inspect the certificate contained within the client request and check for properties like:
- Certificate Authority (CA): Only allow certificates signed by a particular CA
- Thumbprint: Allow certificates containing a specified thumbprint
- Subject: Only allow certificates with a specified subject
- Expiration Date: Only allow certificates that have not expired
These properties are not mutually exclusive, and they can be mixed together to form our policy requirements.