How to use Key Vault references in App Configuration from .NET Framework Console application
Azure App Configuration provides a service to centrally manage application settings and feature flags. Modern programs, especially programs running in a cloud, generally have many components that are distributed in nature. Spreading configuration settings across these components can lead to hard-to-troubleshoot errors during application deployment. Use App Configuration to store all the settings for your application and secure their accesses in one place.
If you want to get familiar with the service, I strongly recommend the Azure Friday video from Scott Hanselman and Jimmy Campbell here The math is simple:
1 picture = 1000 words

14:41 minutes video @ 30 fps = 26,430 pictures

26,430 pictures = 2,643,0000 words
At the moment of writing, the free pricing tier offers 1,000 requests for free per day without any SLA. If you are going to use the App Configuration in production, I strongly recommend going with the Standard tier, which has SLA of 99,9% at supports Private Link, something you probably need to do for production workloads for private access to the key-value pairs.
In your .NET application install the following NuGet packages:
Microsoft.Configuration.ConfigurationBuilders.AzureAppConfiguration
System.Configuration.ConfigurationManager
Edit the applications App.config file, and add the following code under
<configSections>
    <section name="configBuilders" type="System.Configuration.ConfigurationBuildersSection, System.Configuration, Version=4.0.0.0, Culture=neutral, PublicKeyToken=b03f5f7f11d50a3a" restartOnExternalChanges="false" requirePermission="false" />
</configSections>
<configBuilders>
    <builders>
        <add name="MyConfigStore" mode="Greedy" connectionString="${AppConfigConnectionString}" type="Microsoft.Configuration.ConfigurationBuilders.AzureAppConfigurationBuilder, Microsoft.Configuration.ConfigurationBuilders.AzureAppConfiguration" />
    </builders>
</configBuilders>
<appSettings configBuilders="MyConfigStore">
<add key="AppConfigConnectionString" value="<CONNECTION_STRING_FOR_YOUR_APP_CONFIGURAION>" />
</appSettings>
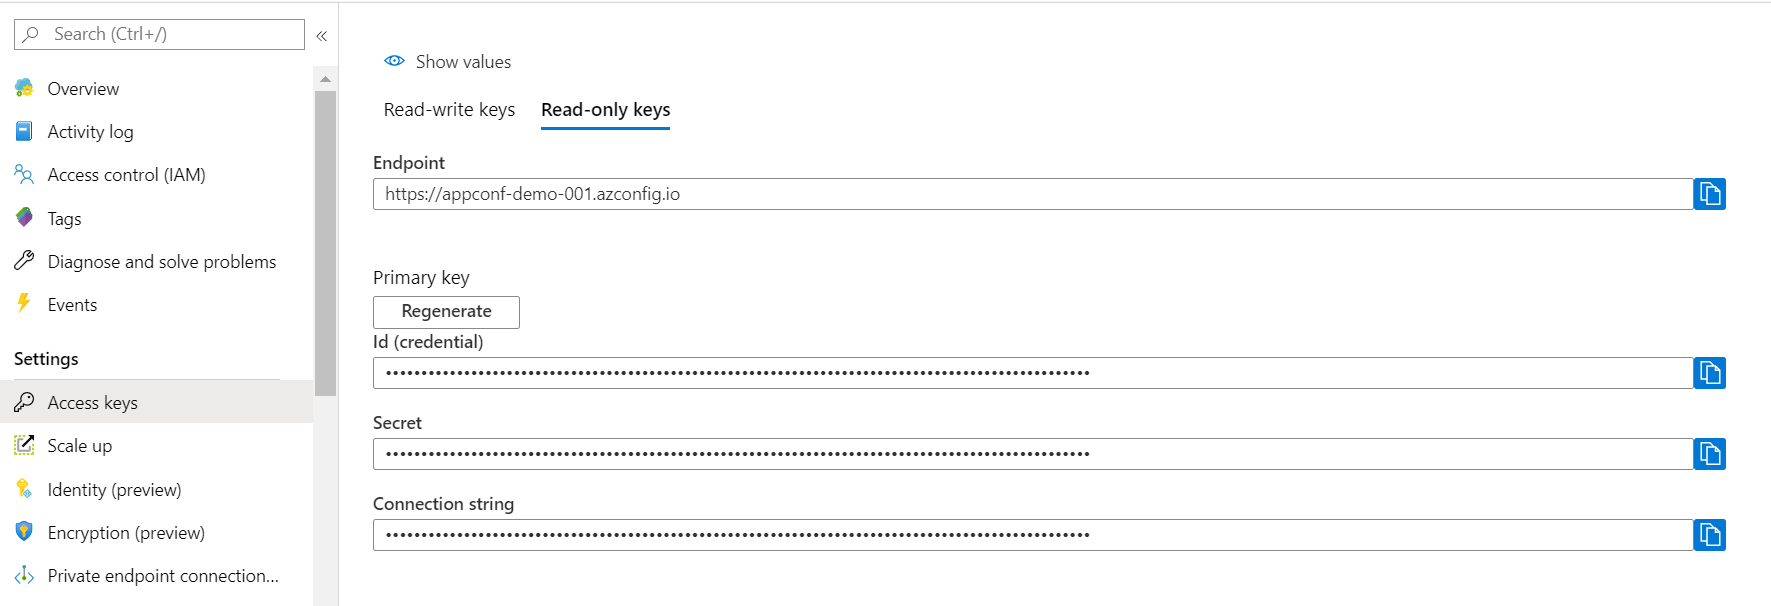
You can copy/paste your App Configuration connection string from the portal. If you are not going to store any key-value pairs from the application, I strongly recommend to go with Read-only keys:
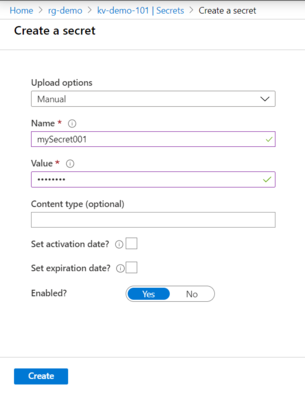
Next, create a secret in Key Vault:
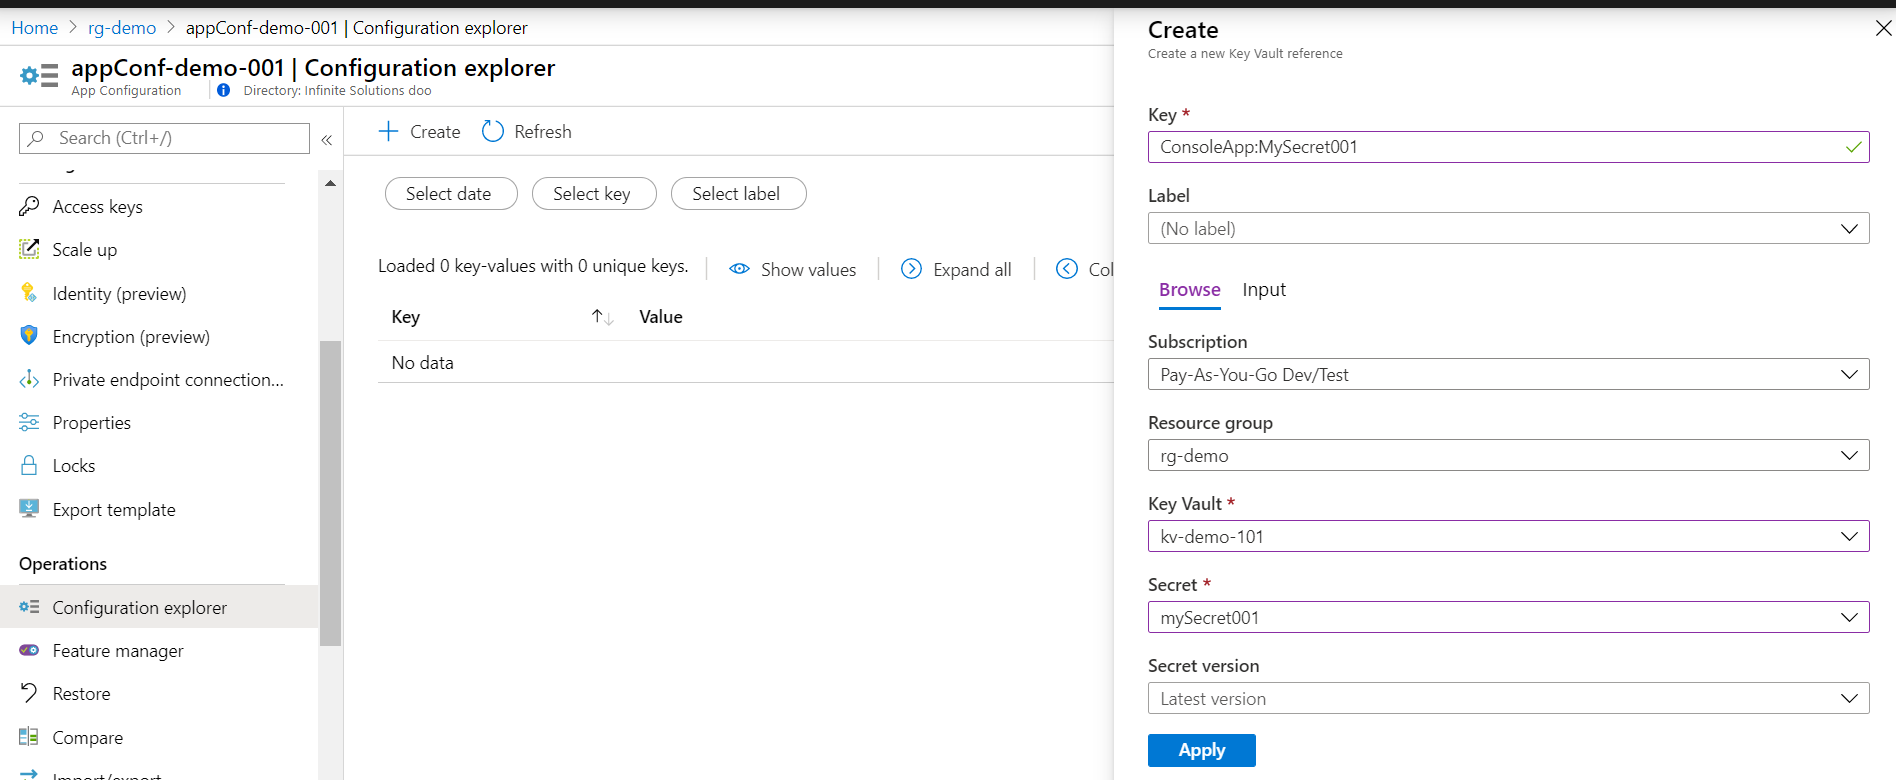
After you created a secret in Key Vault, you need to reference that secret into App Configuration:
To be able to access the Key Vault secrets from the application, we need to be able to authenticate to the Key Vault. The preferred way for Azure services is to use Managed Identity, but because we will access the secrets from the desktop application, we need to use Service Principle. Open the Azure Cloud Shell, and execute the following Azure CLI command:
az ad sp create-for-rbac -n "http://mySP" --sdk-auth
If successful, you will get output similar to this:
{
  "clientId": "7da18cae-779c-41fc-992e-0527854c6583",
  "clientSecret": "b421b443-1669-4cd7-b5b1-394d5c945002",
  "subscriptionId": "443e30da-feca-47c4-b68f-1636b75e16b3",
  "tenantId": "35ad10f1-7799-4766-9acf-f2d946161b77",
  "activeDirectoryEndpointUrl": "https://login.microsoftonline.com",
  "resourceManagerEndpointUrl": "https://management.azure.com/",
  "sqlManagementEndpointUrl": "https://management.core.windows.net:8443/",
  "galleryEndpointUrl": "https://gallery.azure.com/",
  "managementEndpointUrl": "https://management.core.windows.net/"
}
Copy the clientId and clientSecret and in App Configuration create a key-value pair for them. In my example, I named those kvDemo:ClientId and kvDemo:ClientPassword We will use this pair to get a JWT token for the authentication to Azure.
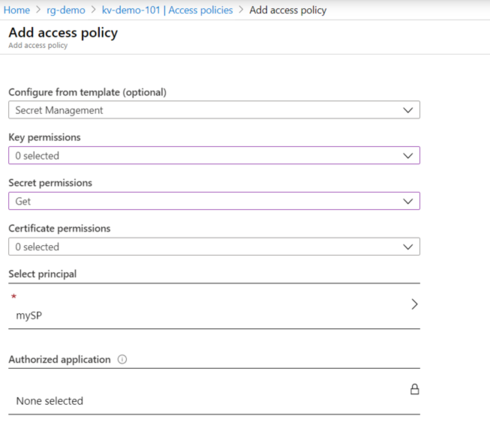
In Key Vault, add an access policy for the service principle to be able to read the secrets:
Back in your .NET application, install the following NuGet package:
Microsoft.Azure.KeyVault
Microsoft.IdentityModel.Clients.ActiveDirectory
If you are using the Free tier, the first thing you need to do when your application starts is to get the kvDemo:ClientId and kvDemo:ClientPassword values from the App Configuration. Otherwise, for each call to the Key Vault, you will request those values from the App Configuration and those will count against your daily limit.
The full code look like this:
using Microsoft.Azure.KeyVault;
using Microsoft.IdentityModel.Clients.ActiveDirectory;
using Newtonsoft.Json;
using System;
using System.Collections.Generic;
using System.Linq;
using System.Text;
using System.Threading.Tasks;

namespace ConsoleApp2
{
    class KeyVaultReference
    {
        public string uri { get; set; }
    }
    class Program
    {
        static string kvDemoClientID = System.Configuration.ConfigurationManager.AppSettings["kvDemo:ClientId"];
        static string kvDemoClientSecret = System.Configuration.ConfigurationManager.AppSettings["kvDemo:ClientSecret"];

        public static async Task<string> GetToken(string authority, string resource, string scope)
        {
            var authContext = new AuthenticationContext(authority);
            ClientCredential clientCred = new ClientCredential(kvDemoClientID, kvDemoClientSecret);
            AuthenticationResult result = await authContext.AcquireTokenAsync(resource, clientCred);

            if (result == null)
            {
                throw new InvalidOperationException("Failed to obtain the JWT token");
            }
            return result.AccessToken;
        }
        static void Main(string[] args)
        {
            KeyVaultClient kvc = new KeyVaultClient(new KeyVaultClient.AuthenticationCallback(GetToken));
            string mySecret001 = Task.Run(() => kvc.GetSecretAsync(JsonConvert.DeserializeObject<KeyVaultReference>(System.Configuration.ConfigurationManager.AppSettings["ConsoleApp:MySecret001"]).uri)).ConfigureAwait(false).GetAwaiter().GetResult().Value;
            Console.WriteLine(mySecret001);
        }
    }
}
Note: If you are hosting your application in Azure, then use the Private Link to access your instance of Key Vault. Otherwise, set a firewall rule in the Key Vault and enable just access from your IP ranges.
Happy coding!