
Integrate Storage with Computer Vision and Cognitive Search using Logic Apps
Scenario
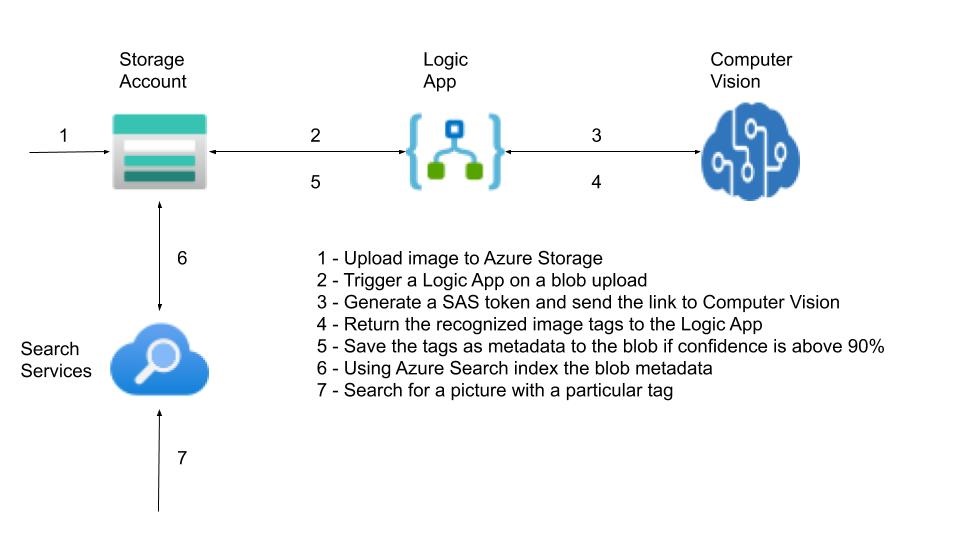
The requirement for this scenario is: each image uploaded to the storage account needs to have auto-generated, indexed, and searchable image tags based on the content of the image. The proposed high-level solution architecture looks like this:
Storage Account
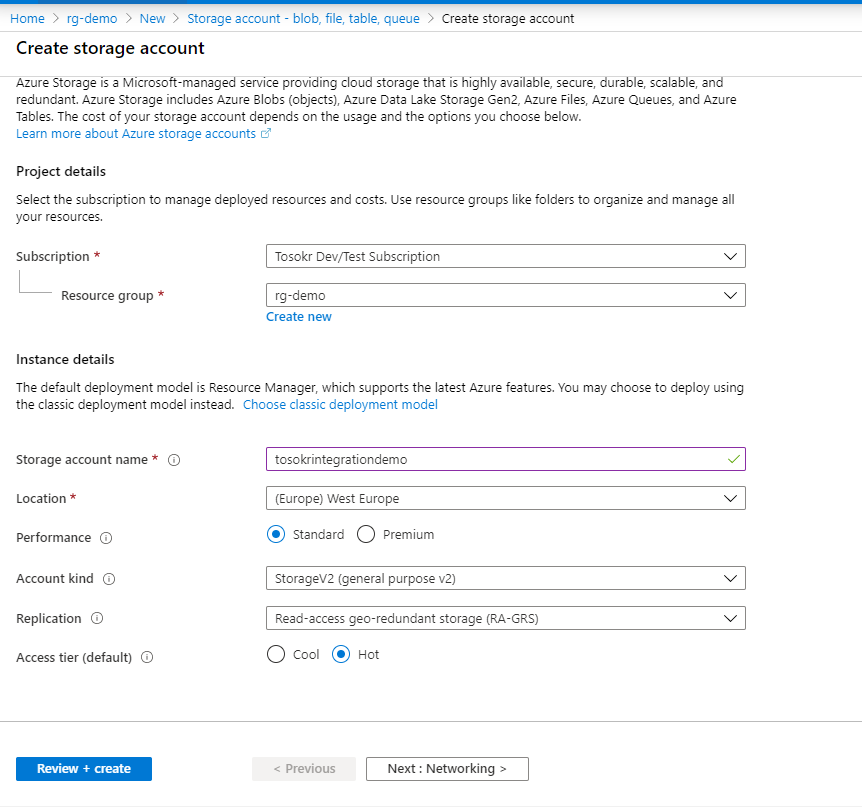
First, we need to create a storage account. Go to the Portal and create a standard V2 storage account. The storage account name needs to be globally unique, between 3 and 24 characters and can contain only lowercase letters and numbers.
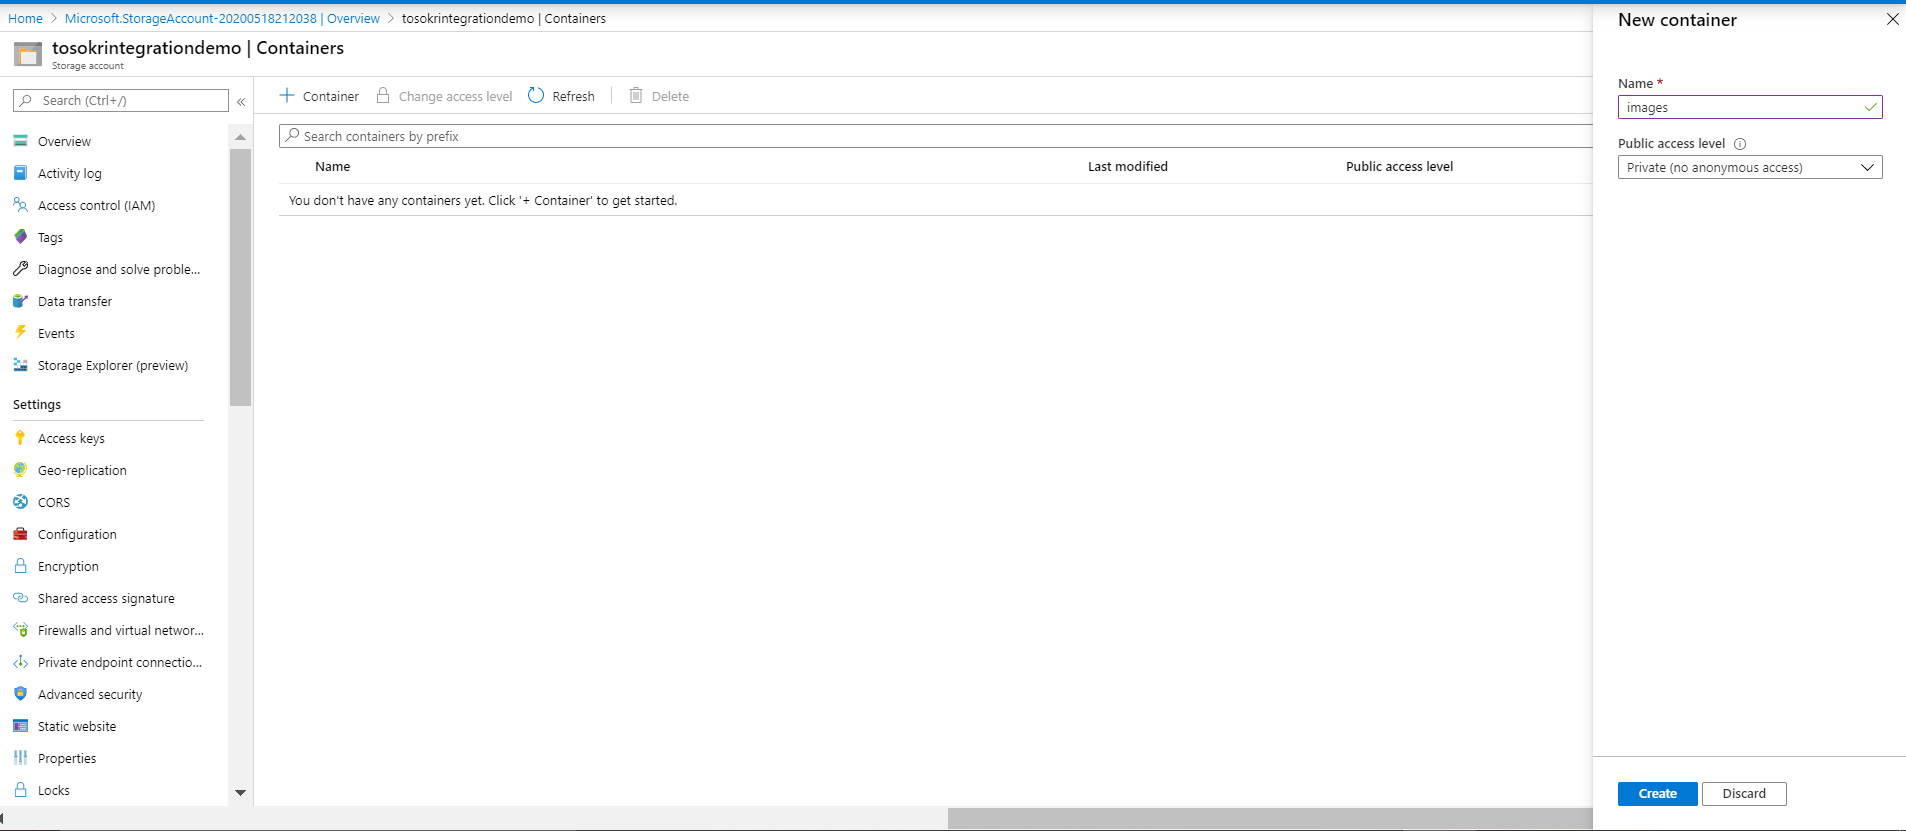
After the creation process finishes, create a container, called images, that will store the uploaded images
Computer Vision
Azure’s Computer Vision service provides developers with access to advanced algorithms that process images and return information, depending on the visual features you’re interested in. For fulfilling our requirements, we will make use of the tags feature:
Identify and tag visual features in an image, from a set of thousands of recognizable objects, living things, scenery, and actions. When the tags are ambiguous or not common knowledge, the API response provides hints to clarify the context of the tag. Tagging isn’t limited to the main subject, such as a person in the foreground, but also includes the setting (indoor or outdoor), furniture, tools, plants, animals, accessories, gadgets, and so on.
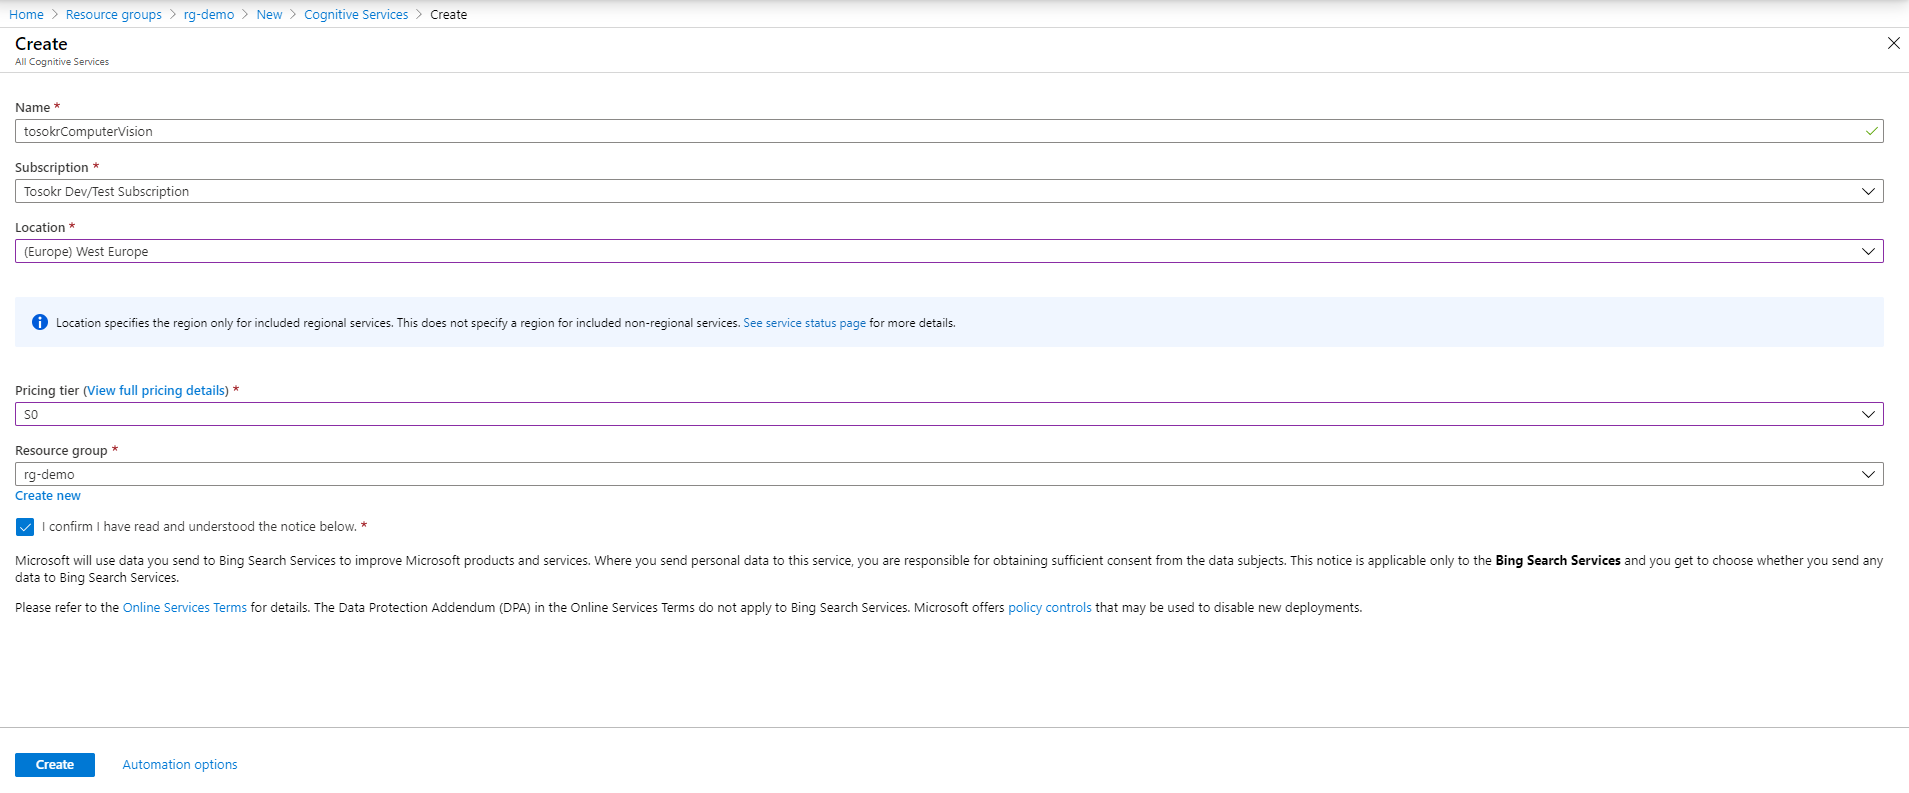
In the Portal, search for Computer Vision and click Create. Select the free pricing tier (you will get 20 transactions per minute, up to 5000 per month)
Logic App
To be able to integrate the storage account and the computer vision service, we will use Logic App. It is an event-driven serverless offering with built-in connectors for integrating disparate systems. The built-in connectors are listed here. You can find the ARM template for the LogicApp in my GitHub repo. I will try to guide you through the steps of creating the Logic App for this purpose:
-
In the Azure Portal, search for Logic App and click Create
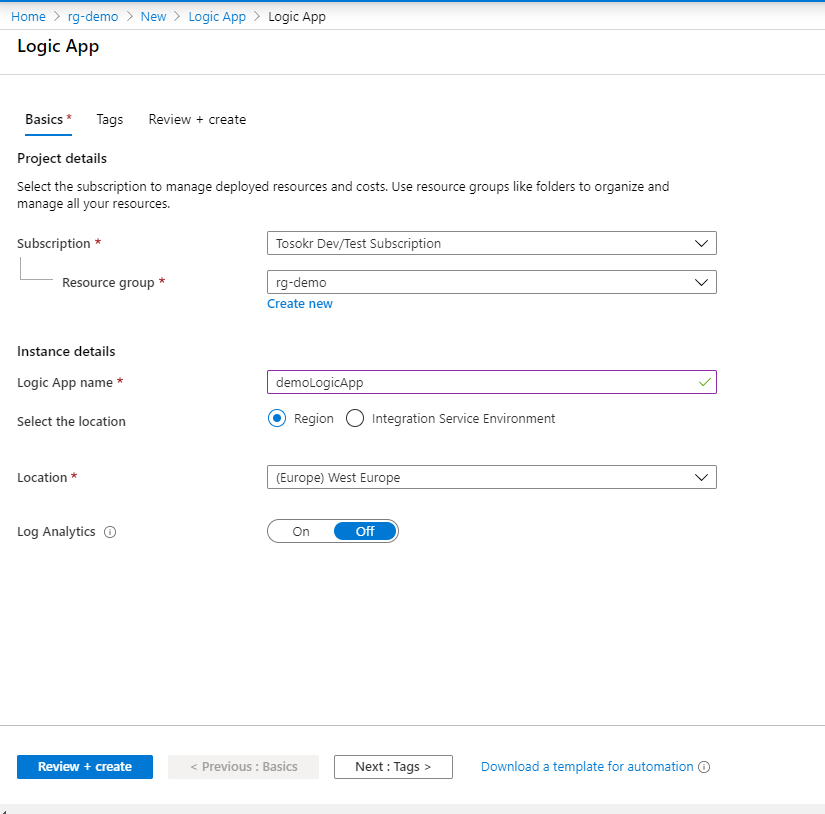
- Start with a Blank Logic App.
-
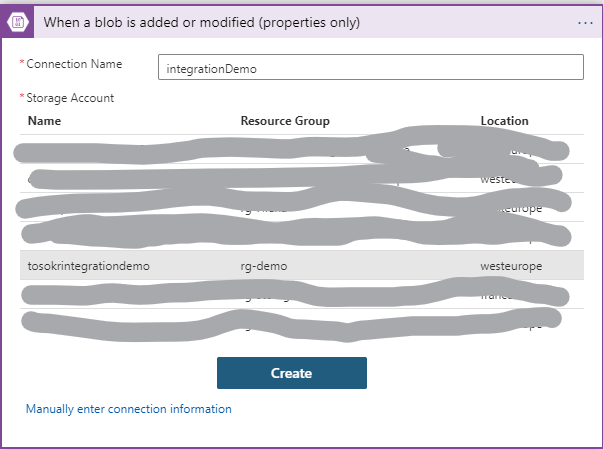
For a trigger, choose “When a blob is created or modified (properties only)”, a part from the Azure Blob Storage integration connector.
-
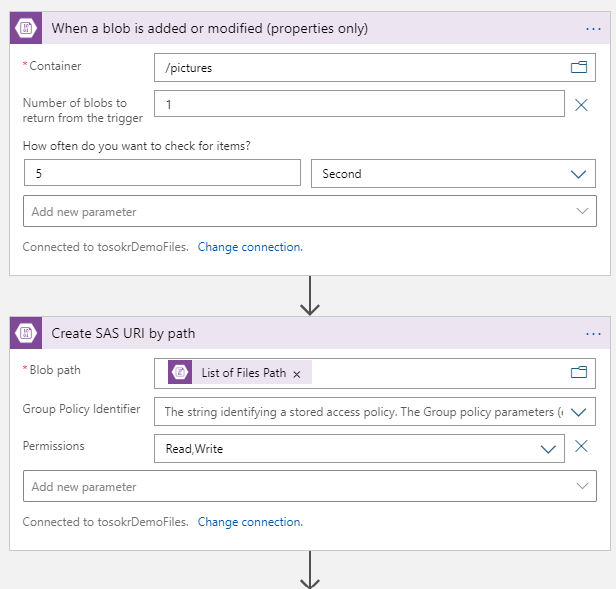
Select the images and set the number of blobs and the interval for checking of new changes. Create a SAS token for the blob, with read & write permissions.
-
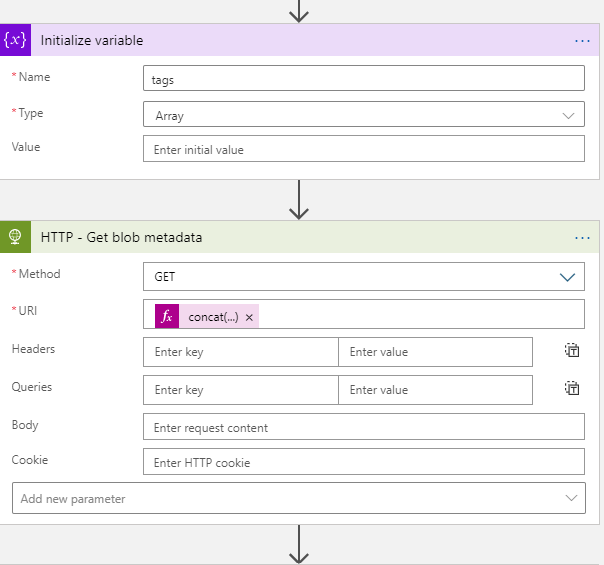
Initialize the tags array variable to store all the discovered tags. Get the existing blob metadata (not part from the initial trigger)
-
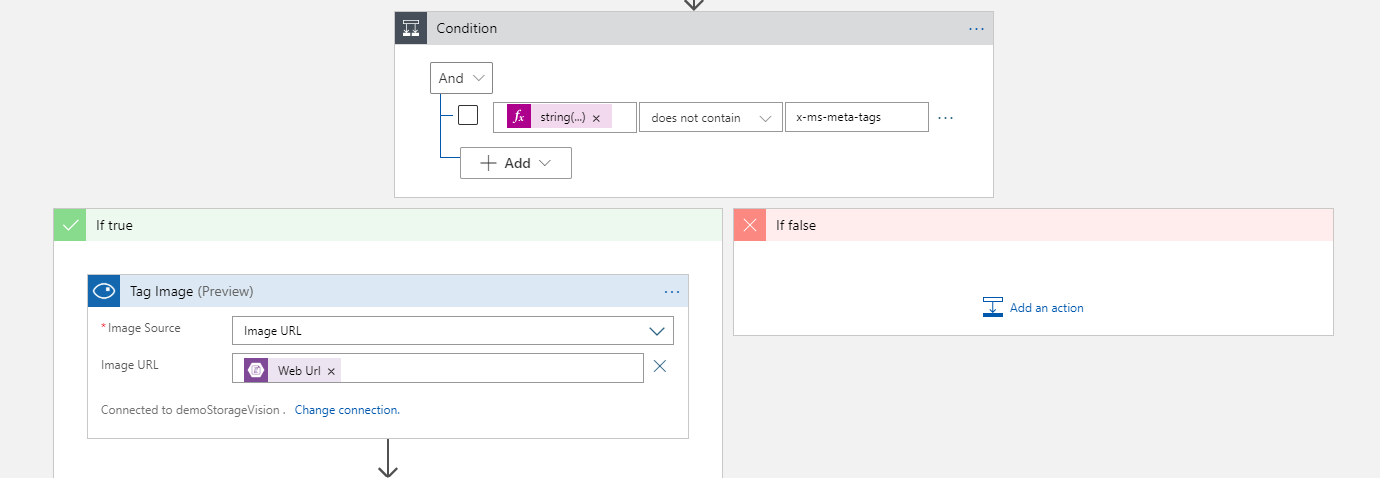
If tags metadata key already exist, stop the execution. Otherwise, call the Computer Vision API, asking it to return the recognized tags for the image. As an image URL, send the blob URL returned from the SAS creation
-
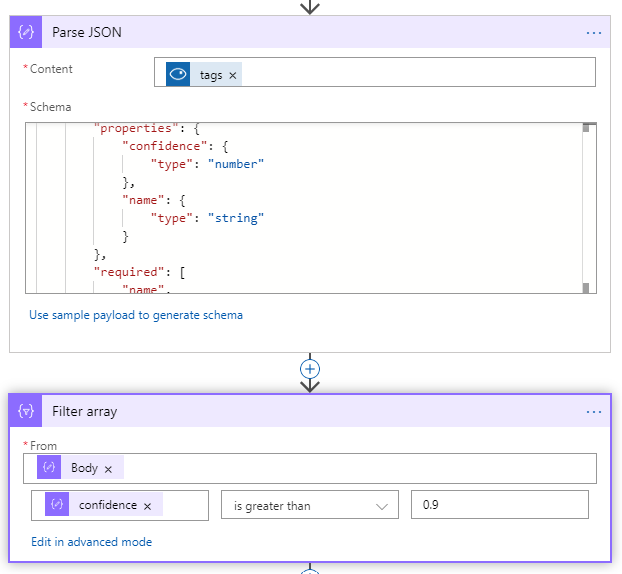
Parse the returned JSON from the Computer Vision API and filter the tags with confidence above 90%
-
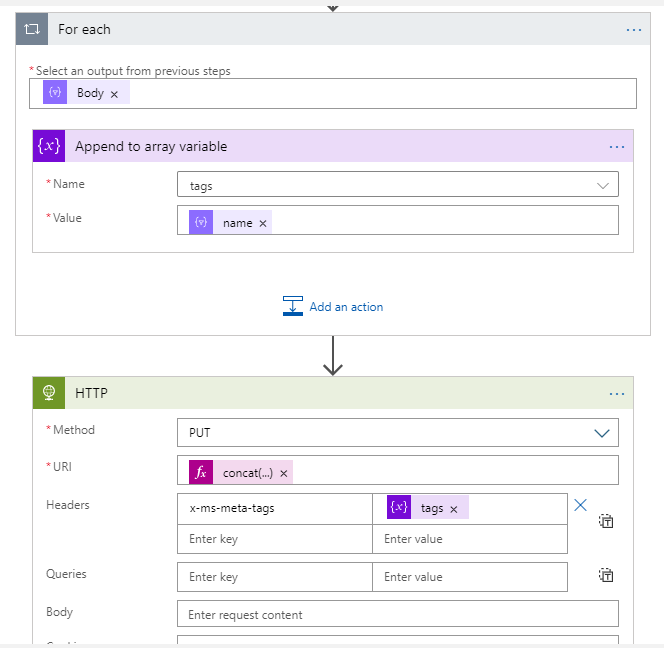
Add the tags to the array variable, and call the SAS Url with header x-ms-meta-tags (will create a new metadata key called tags)
Upload images and generate some tags
Upload some images to the images container, and check if tags are automatically added for those images (tags is a key under blob metadata). You can upload the images through the portal, storage explorer application, or using CLI commands. I uploaded several images, below is an example for two of those images:
| Image | Tags |
|---|---|
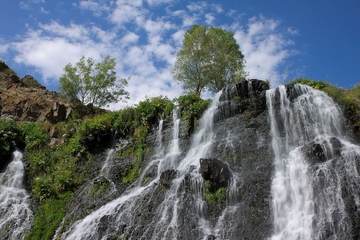 |
“tree”,”water”,”nature”,”outdoor”,”waterfall” |
 |
“indoor”,”laptop”,”text”,”person”,”computer keyboard” |
Cognitive Search
The final step of this demo is to introduce a search per tag capability.
-
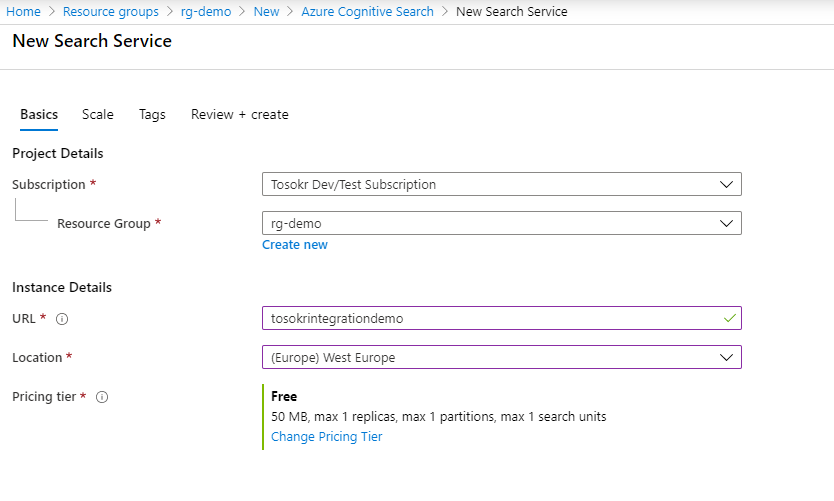
In the Azure Portal, search for Cognitive Search and click Create. Select the Free pricing tier (50MB storage for indexes, up to 3 indexes)
-
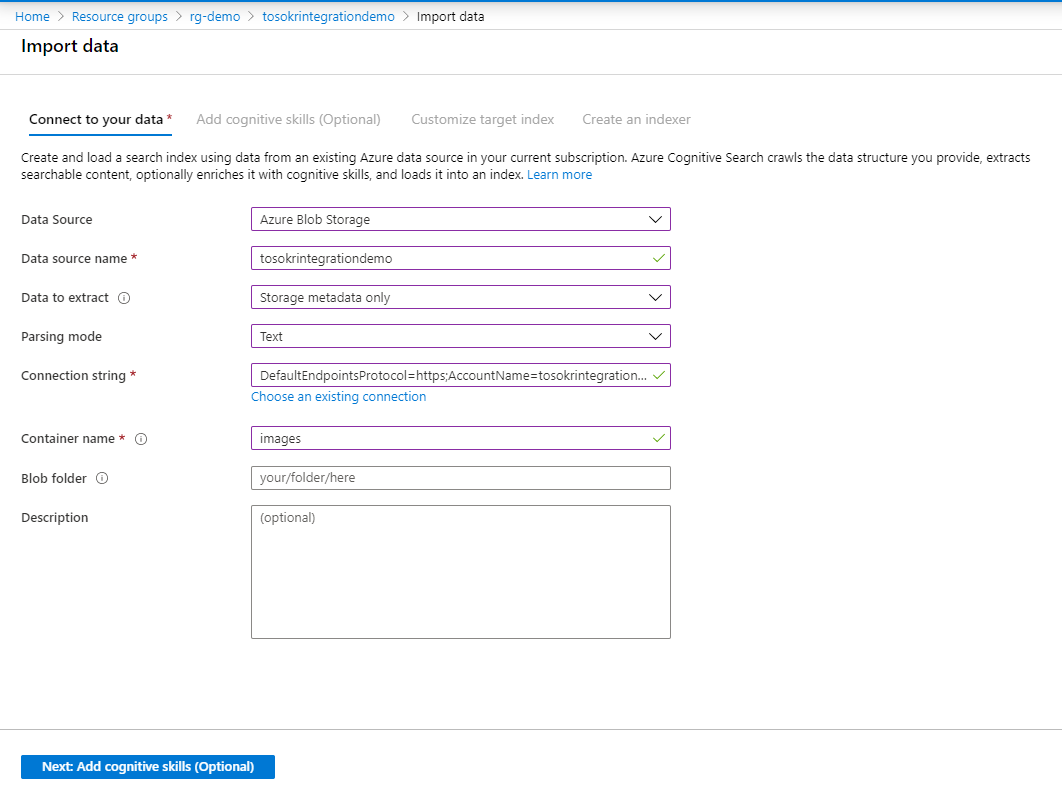
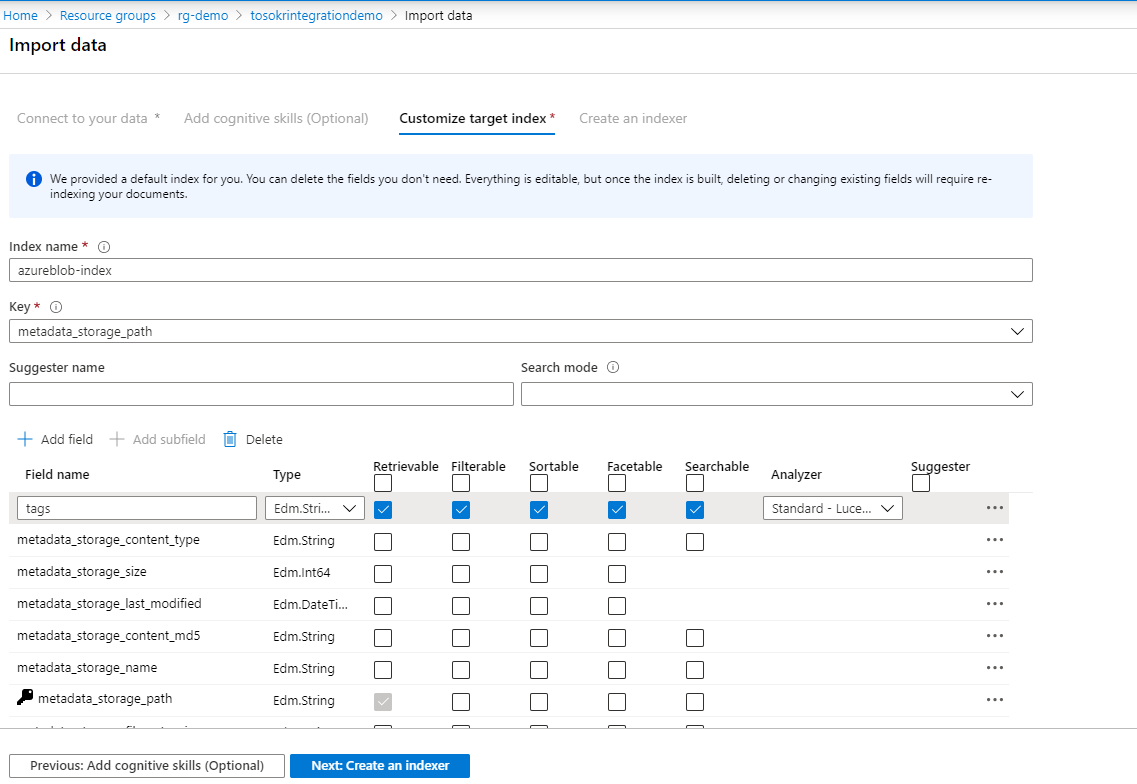
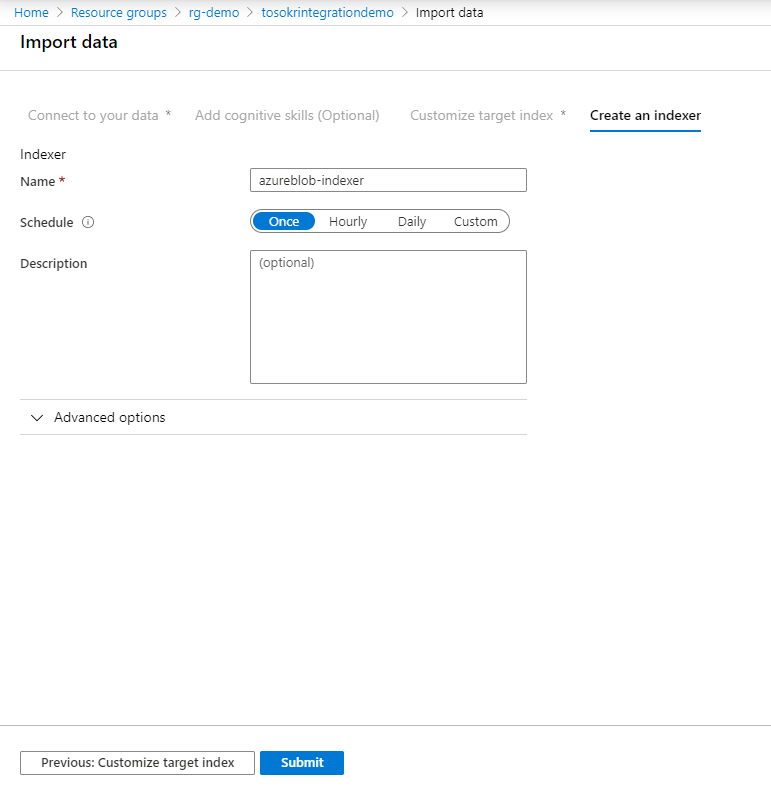
Click on Import data, specify the data source, the target index, and the indexer schedule
-
Open the storage explorer and search for some tag. The metadata_storage_path from the results is a base64 presentation of the storage path of the image.
{
 "@odata.context": "https://tosokrintegrationdemo.search.windows.net/indexes('azureblob-index')/$metadata#docs(*)",
 "value": [
     {
         "@search.score": 0.6349302,
         "tags": "[\"indoor\",\"laptop\",\"text\",\"person\",\"computer keyboard\"]",
         "metadata_storage_path": "aHR0cHM6Ly90b3Nva3JpbnRlZ3JhdGlvbmRlbW8uYmxvYi5jb3JlLndpbmRvd3MubmV0L2ltYWdlcy8yLmpwZw2"
     },
     {
         "@search.score": 0.5291085,
         "tags": "[\"text\",\"wall\",\"computer\",\"laptop\",\"computer keyboard\",\"electronics\",\"mac\",\"desk\",\"indoor\"]",
         "metadata_storage_path": "aHR0cHM6Ly90b3Nva3JpbnRlZ3JhdGlvbmRlbW8uYmxvYi5jb3JlLndpbmRvd3MubmV0L2ltYWdlcy80LmpwZw2"
     }
 ]
}
The first image returned from the seach is the laptop image from above.