Zone to Zone Disaster Recovery in Azure
What is Availability Zone?
Availability Zone is a high-availability offering that protects you from datacenter failures. Think of them as separate datacenter inside one Azure location. For example, West Europe is one location (Amsterdam, Netherlands), but inside that location, there are several datacenters. In your subscription, you can see Availability Zones labeled as 1, 2, and 3. Those numbers are just logical representations of the physical datacenters, meaning that, for example, Availability Zone 1 in West Europe for my subscription can point to different physical datacenter compared to the Availability Zone 1 in West Europe for your subscription.
At the time of writing (May 2020), the following regions support Availability Zones: Central US, East US, East US 2, West US 2, France Central, North Europe, West Europe, UK South, Japan East, and Southeast Asia. Australia East support Availability Zones just for SQL Server and Cosmos DB.
Why Zone to Zone Disaster Recovery for VMs?
There are several factors for using this type of DR:
- The simplicity of the network infrastructure. Disaster Recovery leads to a significant networking changes, new IP addresses, new routes, reconfiguring the DNS servers, and so on. If you failover from one zone to another, you can continue using the same Virtual Network, Subnets, and IP addresses. Also, if your solution includes some of the PaaS services that are zone aware (as Application Gateway or Load Balancer, for example), you can continue using those in case of a zone failover. It is up to the business to decide if they accept the risk of stoping operations in case of a region lost.
- Lower the Recovery Point Objective, because of intra-region replication. The latency between the datacenters in the region is lower compared to region-to-region latency (Note: the claim that latency between zones in a region is always between 1 and 2 milliseconds is incorrect. Check this arcticle).
- Customers don’t want their data to leave the location. For example, a company in the Netherlands don’t want to replicate its data outside of the country
Configure Zone to Zone replication
In the time of writing, Zone to Zone disaster recovery is available only in UK South and Southeast Asia regions. To test the functionality, we will create a VM, configure the Disaster Recovery, and execute a failover.
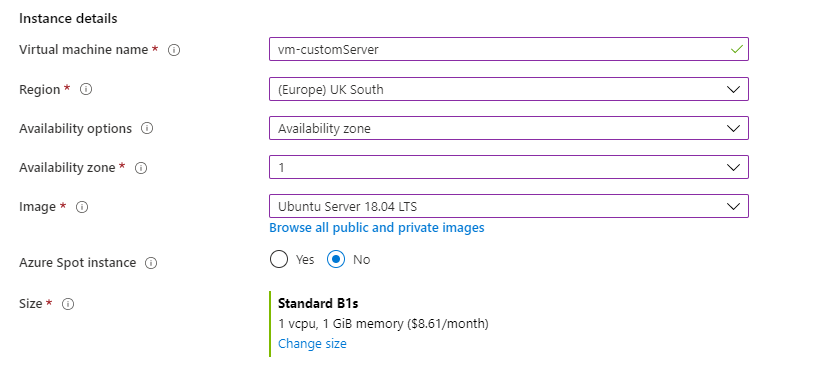
Create the VM
- We need a VM in one of those regions, created in an Availability Zone. For testing, use an Ubuntu image, because of the smaller footprint
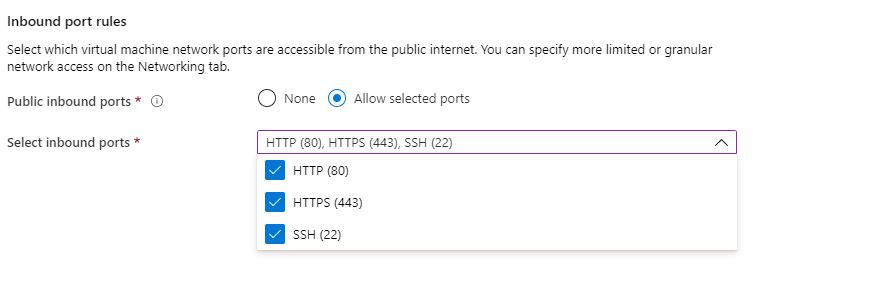
- Under Inbound port rules, also select the HTTP and HTTPs port, because we will do the tests using an Nginx service into the VM
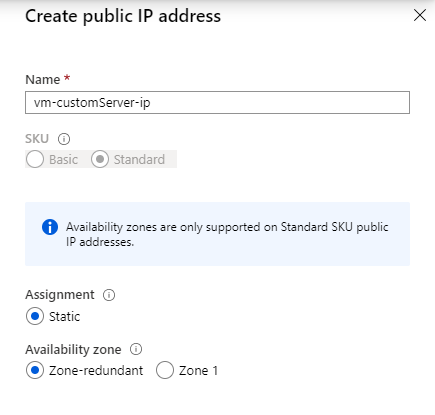
-
When you create the public IP address for the VM, make sure that you choose the zone-redundant option
- After VM is created, login using an SSH connection to the public IP address and install Nginx
 sudo apt-get update
 sudo apt-get install nginx -y
In your favorite web browser, open http://YOUR_VM_PUBLIC_IP. You will see the Welcome to nginx! page
Check VM Compatibility
The kernel version of the VM needs to be supported by Azure Site Recovery.
uname -r
My VM has a 5.3.0-1020-azure kernel. After checking in the support matrix for Ubuntu 18.04 LTS, this kernel is still not supported. The only available solution is to downgrade the kernel to a supported version - for 5.3 the latest supported kernel is 5.3.0-1009-azure.
sudo apt-get install linux-image-5.3.0-1009-azure linux-headers-5.3.0-1009-azure linux-modules-5.3.0-1009-azure
After installing, show the possible options from the GRUB menu:
grep -A100 submenu /boot/grub/grub.cfg | grep menuentry
My output look like this
submenu 'Advanced options for Ubuntu' $menuentry_id_option 'gnulinux-advanced-bdf328db-9606-49ba-8e44-5e1299ae56f0' {
    menuentry 'Ubuntu, with Linux 5.3.0-1020-azure' --class ubuntu --class gnu-linux --class gnu --class os $menuentry_id_option 'gnulinux-5.3.0-1020-azure-advanced-bdf328db-9606-49ba-8e44-5e1299ae56f0' {
    menuentry 'Ubuntu, with Linux 5.3.0-1020-azure (recovery mode)' --class ubuntu --class gnu-linux --class gnu --class os $menuentry_id_option 'gnulinux-5.3.0-1020-azure-recovery-bdf328db-9606-49ba-8e44-5e1299ae56f0' {
    menuentry 'Ubuntu, with Linux 5.3.0-1009-azure' --class ubuntu --class gnu-linux --class gnu --class os $menuentry_id_option 'gnulinux-5.3.0-1009-azure-advanced-bdf328db-9606-49ba-8e44-5e1299ae56f0' {
    menuentry 'Ubuntu, with Linux 5.3.0-1009-azure (recovery mode)' --class ubuntu --class gnu-linux --class gnu --class os $menuentry_id_option 'gnulinux-5.3.0-1009-azure-recovery-bdf328db-9606-49ba-8e44-5e1299ae56f0' {
Construct a string using the submenu id and menuetry id for ‘Ubuntu, with Linux 5.3.0-1009-azure’:
"gnulinux-advanced-bdf328db-9606-49ba-8e44-5e1299ae56f0>gnulinux-5.3.0-1009-azure-advanced-bdf328db-9606-49ba-8e44-5e1299ae56f0"
Edit the GRUB, and change the GRUB_DEFAULT value to the constructed string (copy the string with quotes included)
sudo vi /etc/default/grub
After editing, your file will look something like this:
GRUB_DEFAULT="gnulinux-advanced-bdf328db-9606-49ba-8e44-5e1299ae56f0>gnulinux-5.3.0-1009-azure-advanced-bdf328db-9606-49ba-8e44-5e1299ae56f0"
GRUB_TIMEOUT_STYLE=hidden
GRUB_TIMEOUT=0
GRUB_DISTRIBUTOR=`lsb_release -i -s 2> /dev/null || echo Debian`
GRUB_CMDLINE_LINUX_DEFAULT="quiet splash"
GRUB_CMDLINE_LINUX=""
Save the file, update the GRUB and reboot the server.
sudo update-grub
sudo reboot
After the restart, the server will boot the correct kernel
tosokr@vm-customServer:~$ uname -r
5.3.0-1009-azure
Configure the Disaster Recovery
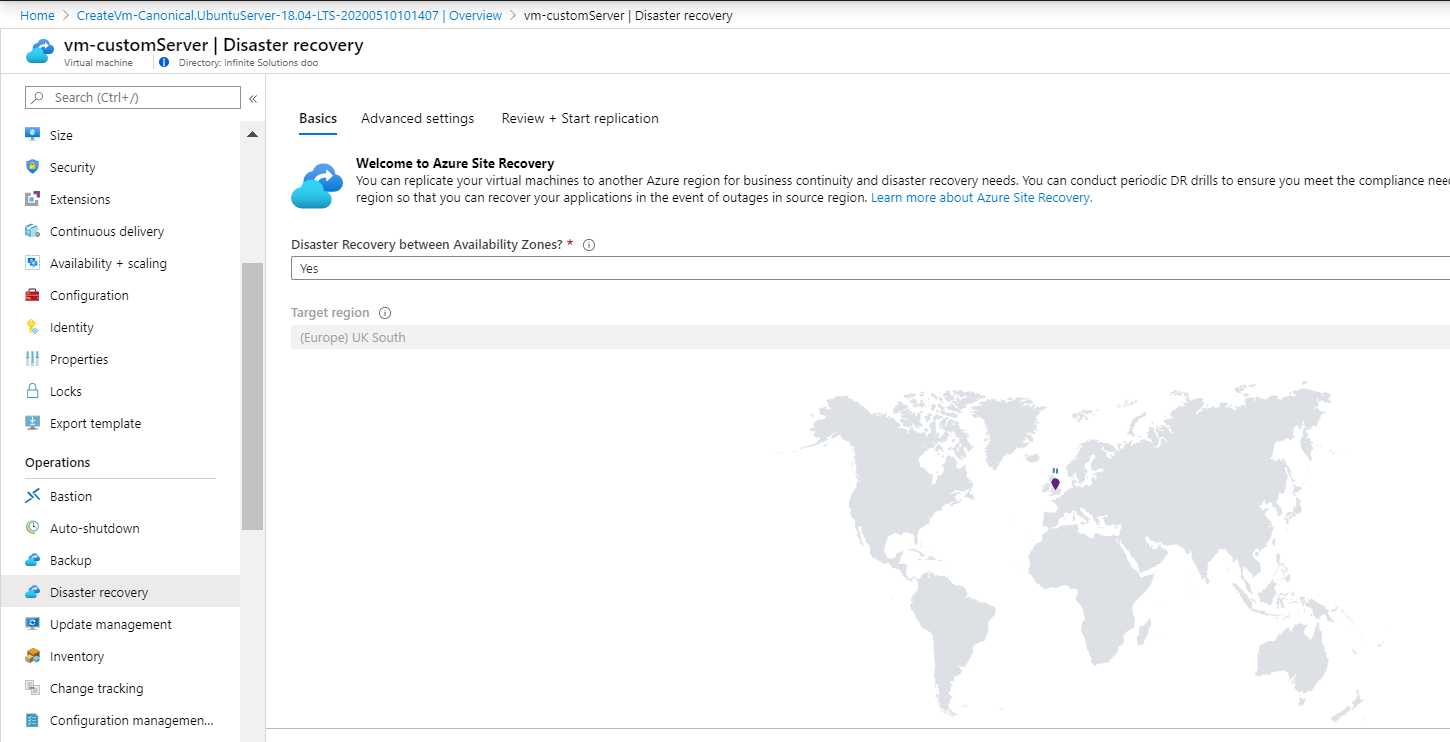
- In the portal, open the VM configuration and from the sidebar select Disaster Recovery. Under “Disaster Recovery between Availability Zones?”, select Yes
- Under Review + Start replication, select Start replication. This will prepare the infrastructure(install an agent in the VM, create the DR resource group, create the Recovery Server Vault … ) and will start the initial replication.
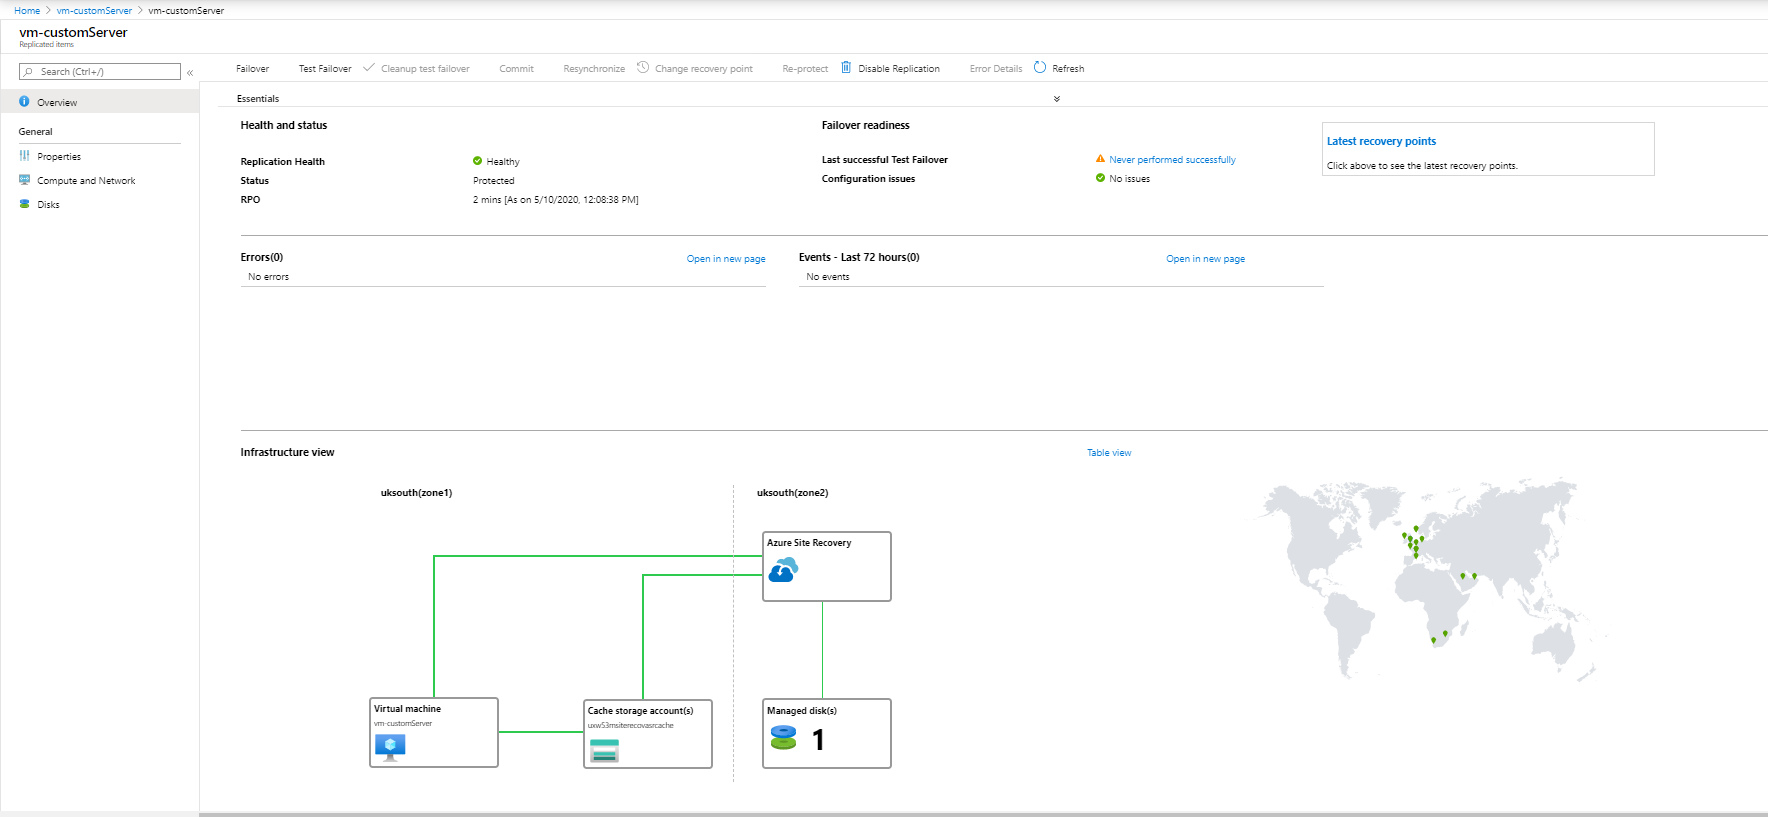
- When the initial replication is finished, in the Disaster Recovery section for the VM, you will see a screen similar to this:
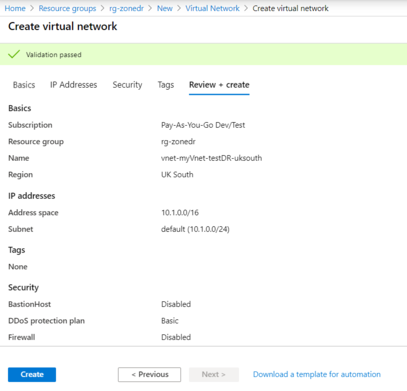
- Create a separate VNET in the same region for the Test Failover.
- Go back in the Disaster Recovery section for the VM, and under Compute and Network, select the newly create VNET as a Test failover network.
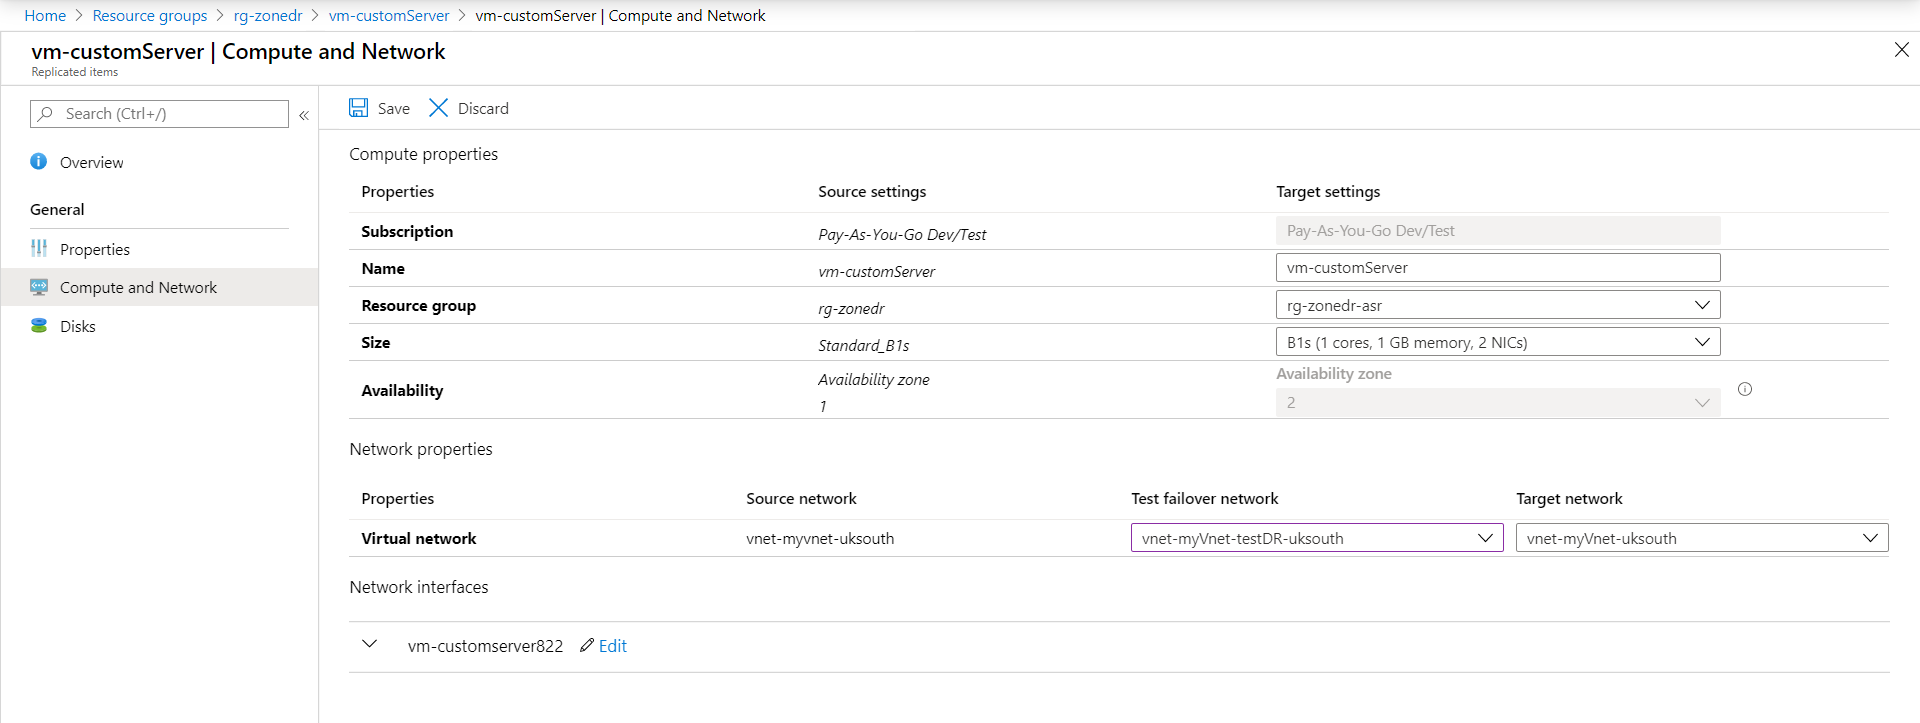
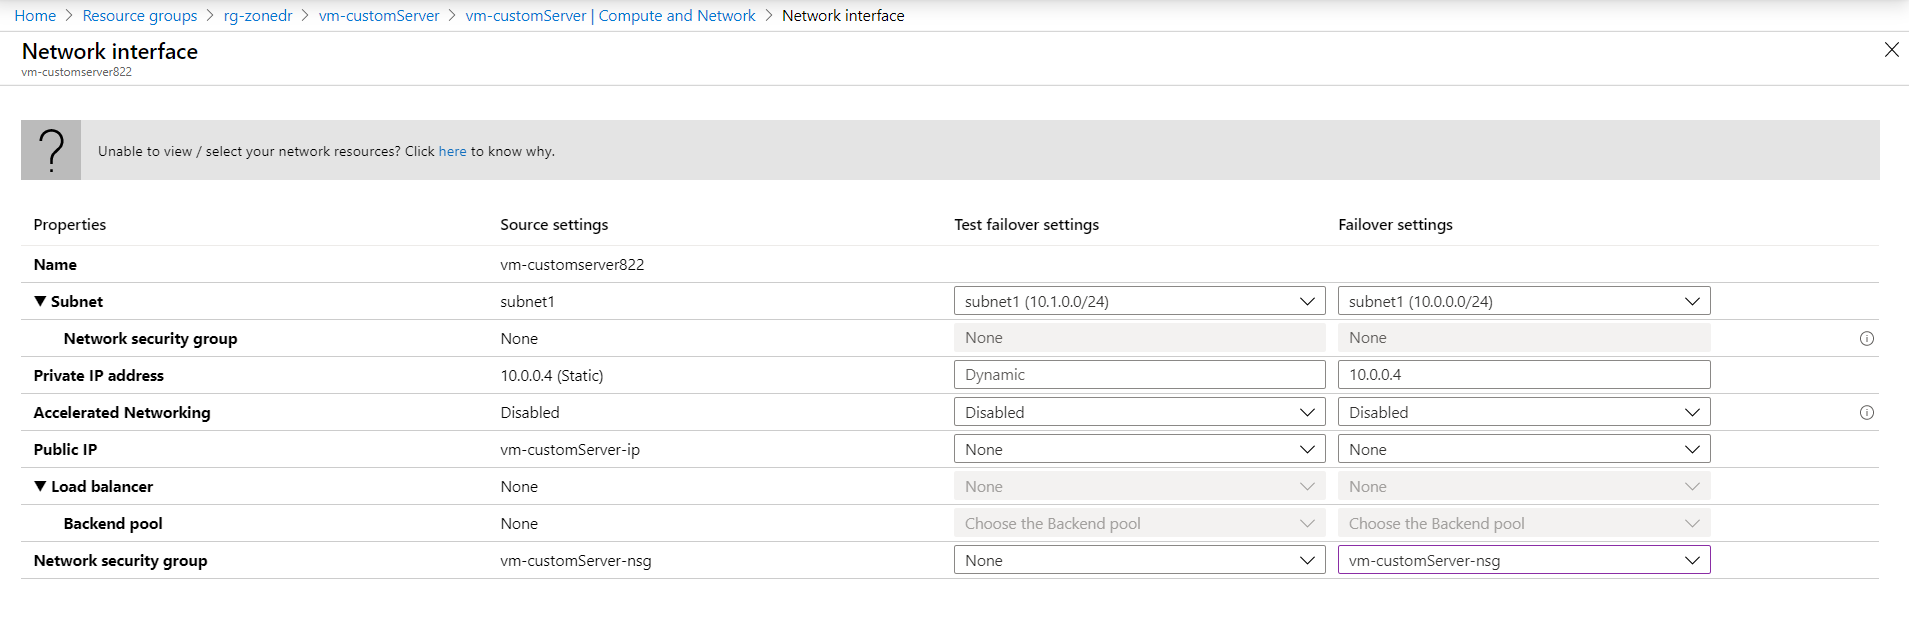
- Under Network Interfaces, click Edit and configure the failover settings. It is not clear here why it is not possible to select the same public IP address under the failover settings. The public IP address we created is a zone redundant, meaning it is usable across the zones in the region. The new VM in the DR zone will have the same private IP address and the same Network Security Group, and we will need to attach the original public IP address manually :(
Perform a Disaster Recovery
- Open the Disaster Recovery section for the VM, and select Failover
- The following warning is displayed: “No Test Failover done in past 180 days! It is recommended to do a Test Failover before a failover”. Because this is a demo, select I understand the risk. Continue Failover.
- Under Recovery point, the following options are available:
- Latest processed (low RTO): restore the latest processed recovery point immediately.
- Latest (lowest RPO): processes all the data that has been sent to the Site Recovery. This option provides the lowest recovery point objective (RPO) but a higher recovery time objective (RTO) compared to other options, because of the additional processing
- Latest app-consistent: restore to a recovery point that guarantees application consistency because it captures all the data in memory and in process. This is very important, especially for database workloads. By default, such snapshots are taken every four hours, but you can change this in the replication policy settings and configure it down to an hour frequency
- Custom: you can manually choose from the list of available recovery points
- Choose the option you like to test and click OK
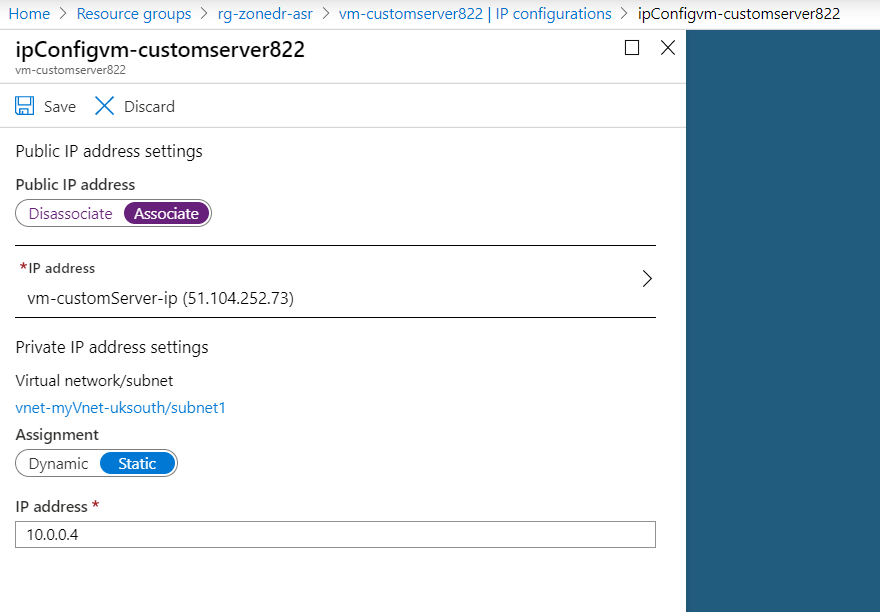
- After the failover finishes, go to the original VM and remove the public IP address from the virtual network interface
- Associate the public IP address to the network interface created in the DR Zone
- Open http://YOUR_VM_PUBLIC_IP You will see the Welcome to nginx! page
- After you verify that everything is OK, Commit the failover. Commit means that you confirm the failover. After committing, you can’t change the recovery point of the failover.
Perform a failback
If you want to failback to the primary zone, you need to reprotect the VM. Reprotect reestablish the same process, by replicating the VM back to the primary zone. After finishing, you can follow the steps from above to execute failover back to the primary zone.
Summary
Zone to Zone Disaster Recovery can be beneficial in some particular scenarios. The network simplicity is the main advantage, although the missing functionality for automatic assignment of the public IP address in case of failover introduces some unnecessary manual steps. For existing deployments, to use Zone to Zone DR, you need to have your VMs running in a particular zone. Please check the Migrate virtual machine into availability zone post if you need to migrate the existing VM into an Availability Zone. The service at this moment is available only in two regions, but probably expansion will follow in the next months.